Brief
This project is a part of the assignment of the university’s module named “Negotiated Design Placement”. The purpose of this module is to undertake the major negotiated task to form the backbone to your experience of Level 6 of the programme. It will normally take place with an industrial partner whom the student has identified and approached to host their learning task. Students can choose work placement or a client project throughout this semester. I was not able to be applied to the company for which I want to work for doing a long internship this semester but as an alternative choice, I’ve found a client who is relative to architectural visualization. Architectural visualization is the most interesting area for me so I decided to work with this client.
My client is my Japanese friend who would like to open his new café. He asked me to create a new café layout in 3D. Below pdf is a document showing us the detail of the brief from my client.
Objectives
The main purpose of this project is to understand how professionals work in the industry that students are interested in through work placement or client projects. My client project was to create a 3D model of a new café. It is included from sketch concepts to making it into 3D. The opportunity is to engage pipeline for arch vis. The objective is to design an attractive cafe&bar and share 3D images among designers, builders, and owners.
Setting SMART Objectives and Goals:
For the goals, I am setting myself I have broken them down into S.M.A.R.T goals to better structure these objectives to make them easier to understand. This stands for:
• Specific
• Measurable
• Attainable
• Relevant
• Time-bound
Weekly Reflection
Week 1
Define, Planning, Meeting – Time management
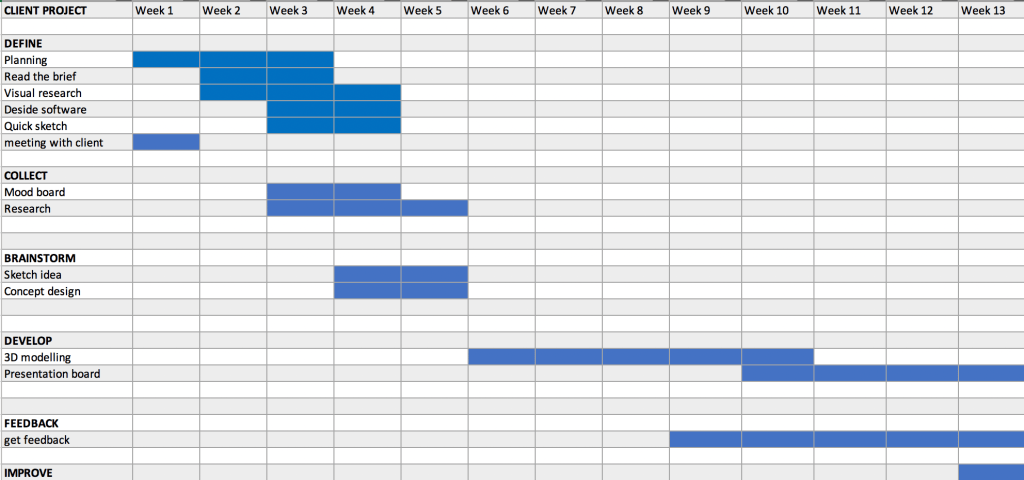
At the beginning of the project, we had an online meeting with a client through Zoom. We had discussed the detail of the project and the time plan. After the meeting, I have created a Gantt Chart which have been broken the task into small categories by Design Process. Although the deadline is by the end of this year I decided to finish at the same time as the end of the semester. That is why the Gantt chart show from week 1 to week 13.
I also shared my tasks with Debs who is my lecturer in the tutorial. She gave me some Pinterest’s links that show Presentation Boards for Arch Vis. https://www.pinterest.co.uk/debswilson/architectural-visualisation/presentation-boards/
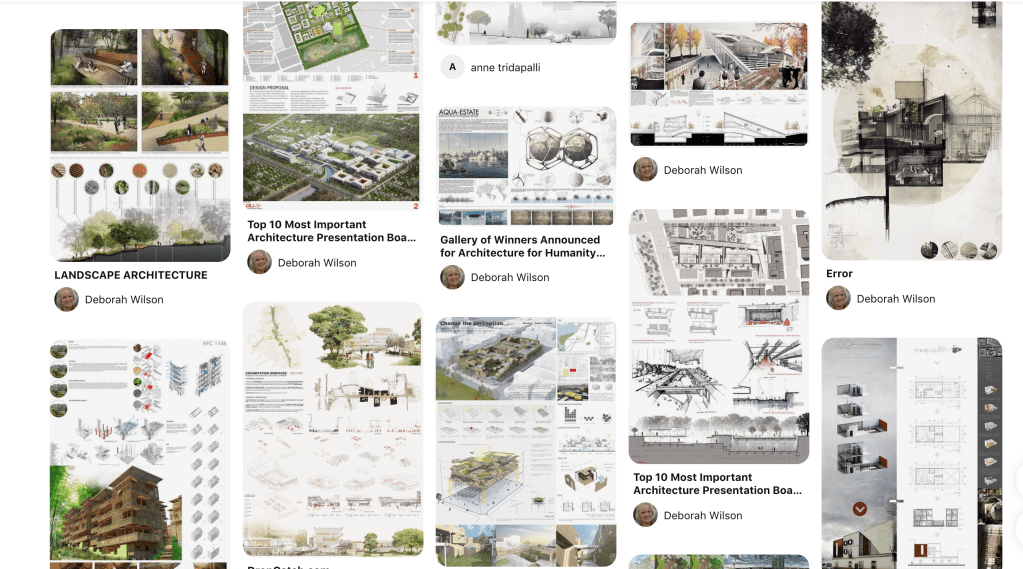
They have inspired me and I decided to present my cafe model to clients in this style after finishing the 3D model.
Week 2
Project Managemnt
In week 2, I thought it is important to do management to share my weekly tasks with clients and the lecturer. In order to manage my project effectively, I have used CANVA and Padlet.
CANVA – presentation
I will use this presentation for showing what I have done so far.
Padlet –
Padlet will be used for organising my project and sharing my works with the client and the lecturer as quickly as possible.

Moreover, I considered what software would be best to use for this project. My client did not mind which software I will use. Therefore I decided to use Autodesk Revit because I would like to improve my skills on Revit. Although I also wanted to use Twinmotion and 3DS MAX, It was not enough space for downloading my Laptop and enough time. I think this was not a good process through this project. By next semester, I will upgrade my laptop and try to use them to show more skill as a 3D visualizer.
Week 3
Research, Collect
In week 3, I have researched the layout of the café and I created mood boards gathering my inspirations.

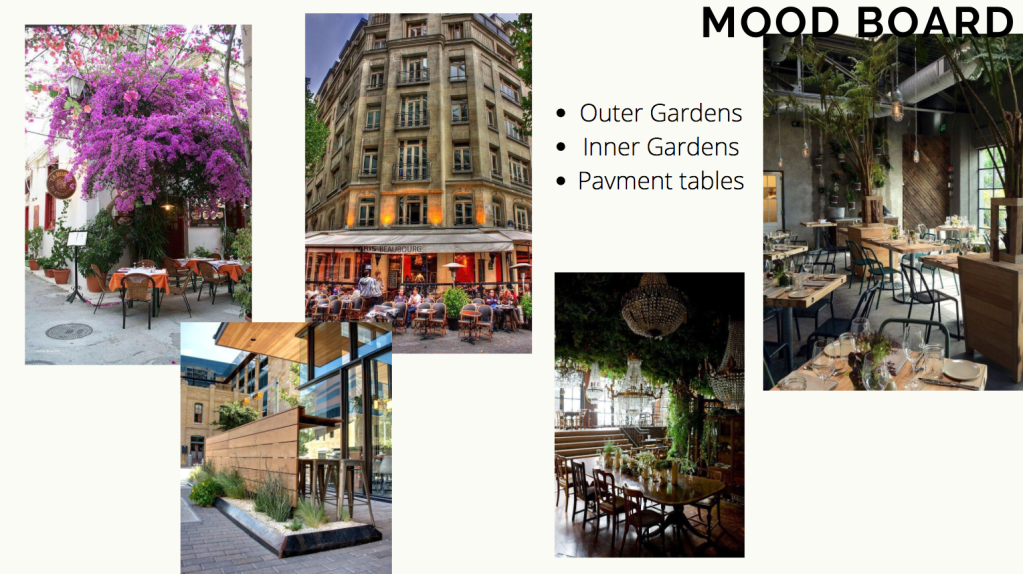
From the second year, I have had a passion for Biophilic Design and I thought I can use biophilic design for this project. I discussed with my clients and decided to make a biophilic design cafe model.
In addition, my lecturer sent me some links regarding café layout, ways to make your coffee shop stand out, café marketing tips and so on. Those links are on Padlet.
Below is a part of the research:
・It’s a fast-growing sector that provides relaxed social spaces, as well as flexible locations to work.
・social distancing rules will need to be enforced for the foreseeable future, with signs prominently displayed to remind customers and your staff to maintain a 2m distance where possible and if not, 1m.
・Think ahead and make the most of the space in your coffee shop
- You will have to think outside the box to stand out, as coffee shops have the potential to be more than a place to grab a cappuccino. ‘Events’.
・Make the customers’ experience the best it can be
– your customers will still want to enjoy their experience in your coffee shop, and it should still be somewhere memorable, where they are made to feel welcome.
In order to control numbers, have a member of staff at the entrance to only allow customers in when there is room for them to drink their coffee safely and also to organise a queuing system.
・Make the most of the exterior space of your coffee shop
– If you do have an outside space, make this appealing.
- Put out pavement signs to get your coffee shop noticed by people passing by – make people smile with a clever pun!
- Set up signage outside clearly highlighting safety rules and distancing obligations
- Consider exterior lighting
- Use canopies to extend outdoor seating to all weathers
- Keep exteriors clean, tidy and fresh
・How to make your coffee shop more appealing
- Colours – don’t be afraid to make a statement, choose from your colour palette and be consistent with your branding
- Music – appropriate in both choice and volume level
- Lighting – attractive fittings and fixtures with a right level of light to set the mood, ambiance and function
- Crockery & glassware – invest in good quality to reflect your brand. Condiments will need to be removed and served in single sachets on request
- Artwork – ensure it is eye-catching and consider getting local artists to showcase their work
- Keep your coffee shop clean, including windows. You will need an enhanced cleaning regime so that customers can see that everything is spotless. Tables will need to be wiped down after every customer
- Be consistent – from your sign to your menus, embrace your brand and the experience you are creating for your customers
・The interior design of your coffee shop should reflect your brand
The décor and the furniture are amongst the first places to start, as these will immediately create an impression and will directly impact the experience of your customers. Your space needs to be visually appealing, yet comfortable and practical, and above all, warm and inviting. It’s worth considering a theme to bring your brand and concept to life, which could include creating a modern, rustic, traditional, contemporary or vintage image.
Comfortable sofas and chairs will help your customers to relax, although these will need to be spaced to comply with social distancing rules, and sofas will have to accommodate fewer people.
・Know your brand to create a competitive advantage
It’s your identity, it’s the colours you use, the font type you pick and the imagery that best represents you. There could be a number of coffee shops on the same street but what gives you that kerb appeal? Why should people visit your coffee shop over the others?
・Getting to know your customers better
Establishing your target audience requires knowing what your customers predominantly do.
Week 4
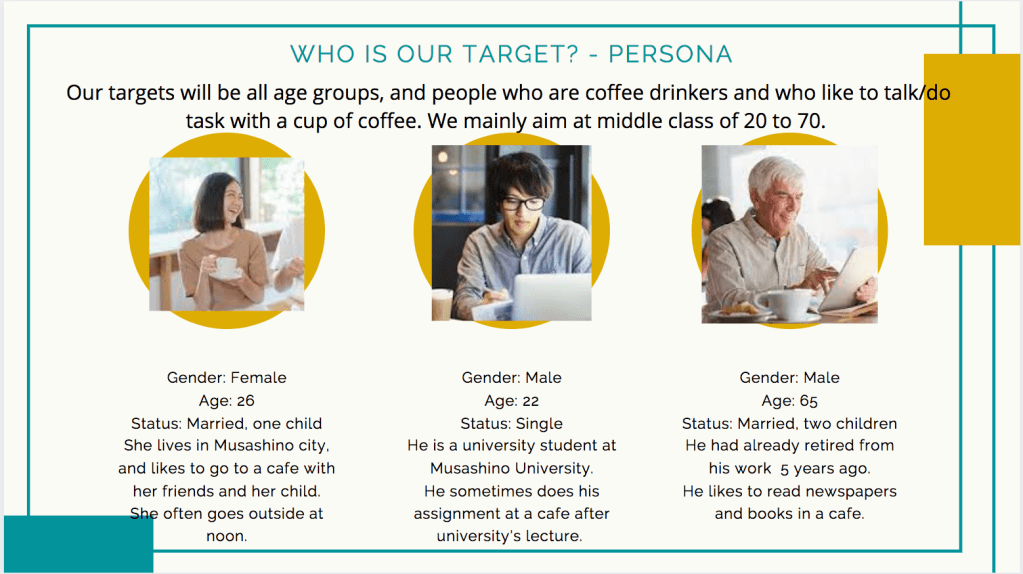
Persona, Sketch
I have considered persona for a new cafe to clarify our target audience. Our target will be all age groups, and people who love coffee and who like to do tasks/talk with a cup of coffee. We mainly aim at the middle class of 20 to 70.
User personas help designers to create understanding and empathy with the end-users. Thanks to personas designers can:
- Gain a perspective similar to the user. Creating personas can help designers step out of themselves and recognize that different people have different expectations and needs. By thinking about the needs of fictional personas, you may be better able to infer what a real person might need.
- Identify with the user they are designing for. The more designers engage with personas and see them as real people, the more likely they will be to consider them during the design process and would like to create the best product/service for them.
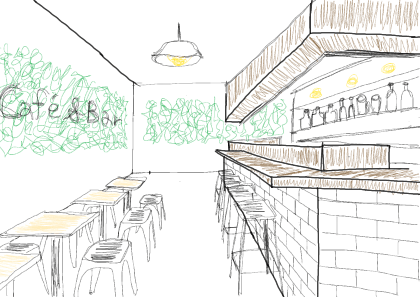
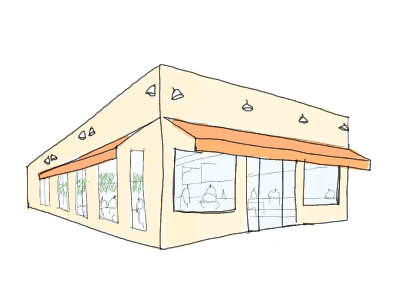
The below pictures are my rough sketch by referencing inspirations. Although they are very quick sketch and rough, my lecturer praised these sketches. It led to my confidence.
Week 5
Research, Meeting
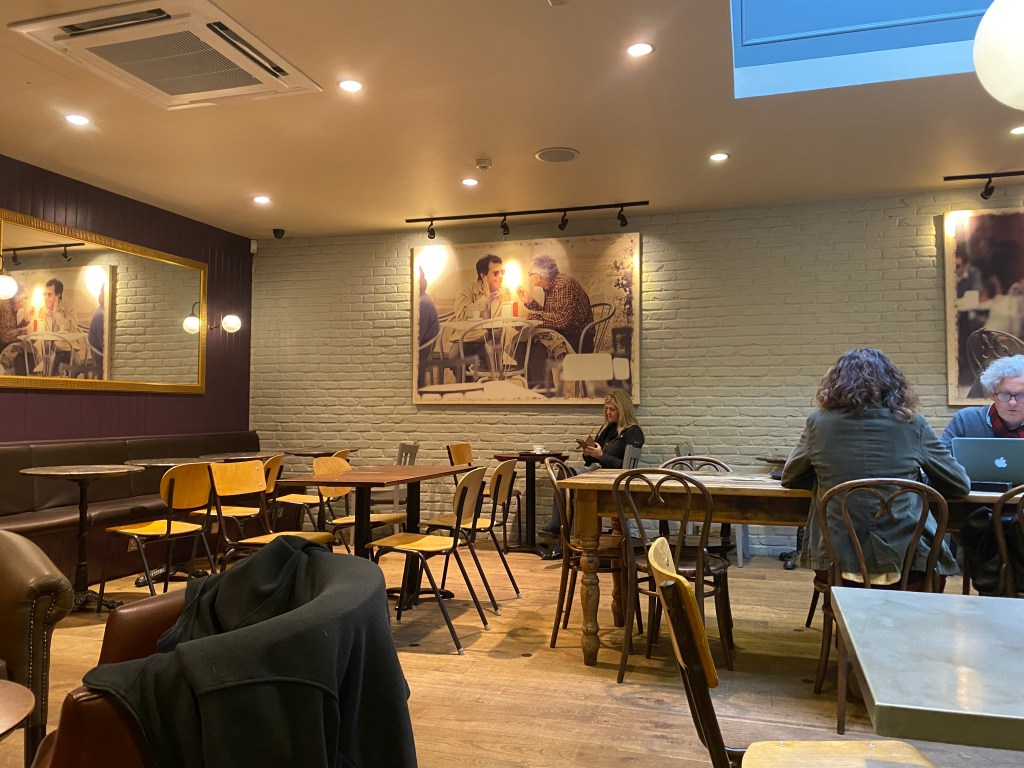
These pictures are the inside of cafe NERO in Winchester. This cafe is my most favourite cafe in the UK and I often go here for grabbing a cup of coffee. The layout of cafe NERO had a good impact on me when making a new cafe model. NERO is using different types of chairs/sofas and desks in each area. They have a lot of lights on the ceiling and have a mirror and pictures on the wall. I thought these features are good points for making a comfortable cafe.

I had an online meeting with the client twice a week at least. I shared tasks using Padlet and received feedback each week.
Week 6
Start 3D modelling on Revit
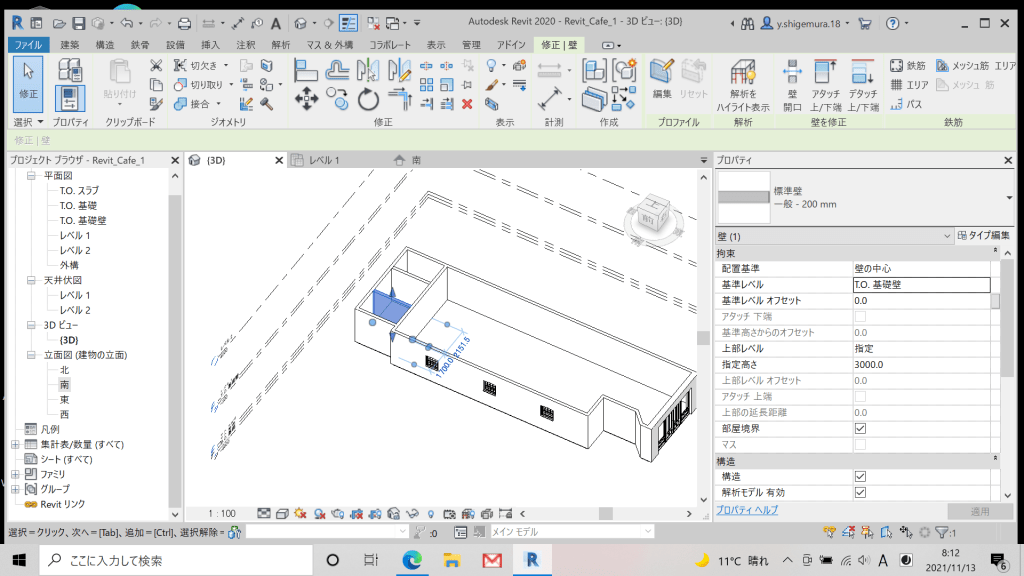
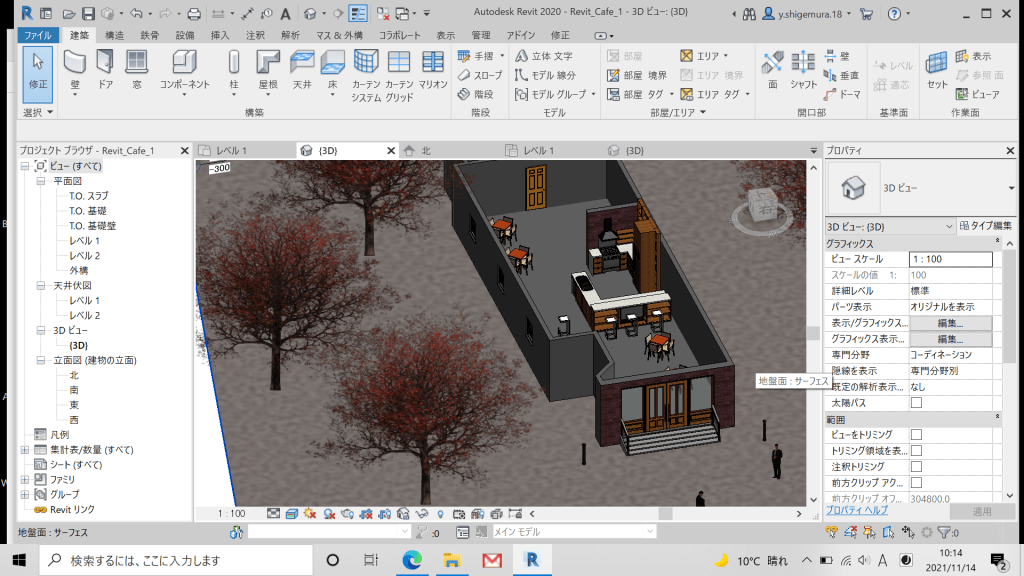
Below is a design drawing for a new cafe and I began modelling with this plan on Autodesk Revit.

I began with creating a new Revit project and the design drawing was imported to the project on Autodesk Revit. At first, I was creating the floor and walls, entrance and windows. I also downloaded the asset family such as kitchen and dining tables. Each object was placed by considering the effective use of space for the cafe.


Week 7
3D Modelling on Revit, Feedback
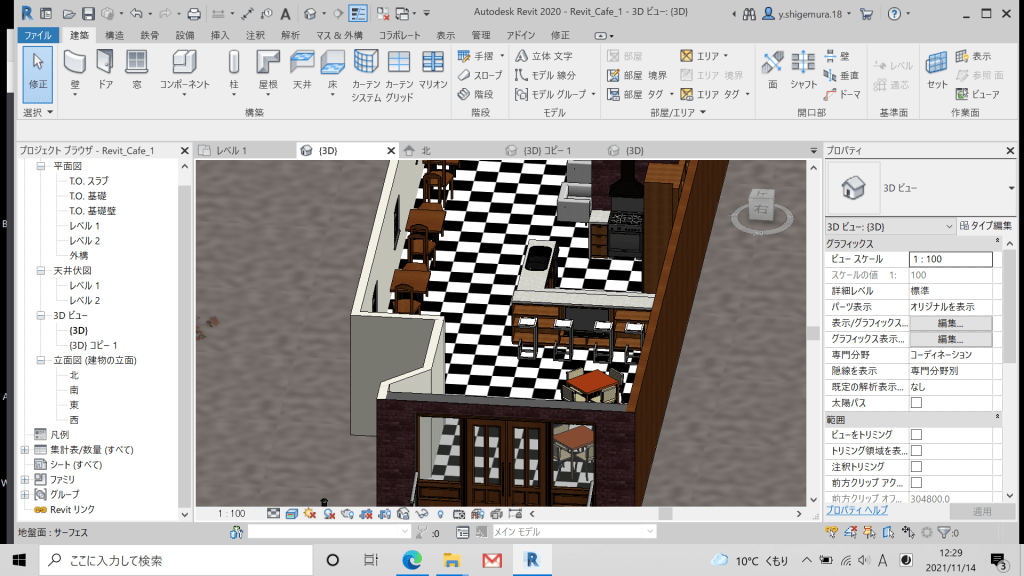
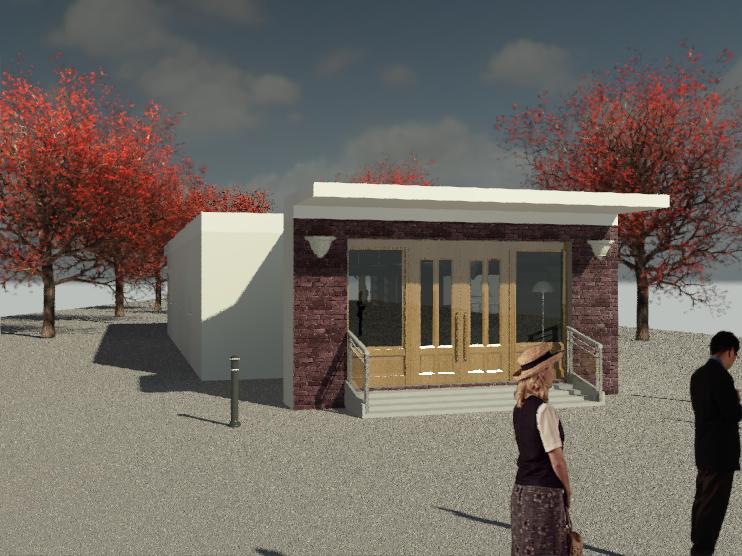
I continued creating a 3D cafe model on Revit in week 7. I have begun by adding outside assets such as trees and people. It allowed making the 3D view more real.
After that, I added more inside assets, and then I changed the floor colour to black and white ceramic tiles. This cafe will be opened in Tokyo, Japan but this cafe is going to be more British style to attract people. That point will be expected to be a unique point compared to other cafes in Tokyo.


After creating the model like above, I shared it with my client and receive feedback from him. The feedback was that the dining table which has 4 chairs had better change to more cafe style.
Week 8
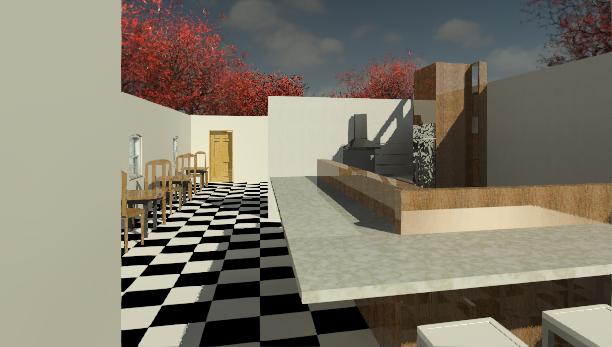
Feedback and Improve
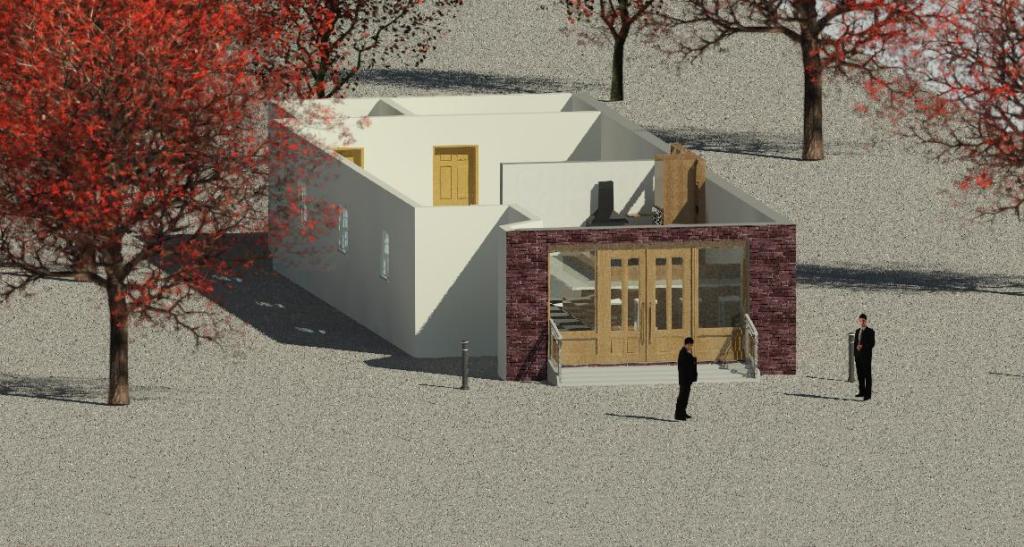
After receiving the feedback, I was rethinking the style of interiors. I added the mirrors on the wall and I changed the number of doors from one to two. The below pictures are rough rendering images and it was rendered using only sunlight because it has no roof and inside light. The next step was making roofs and lights so I talked that with Debs who is my lecturer and I got some tutorials to video about the making ceiling, roofs and lights. That was helpful in finishing the model for next week.


Week 9
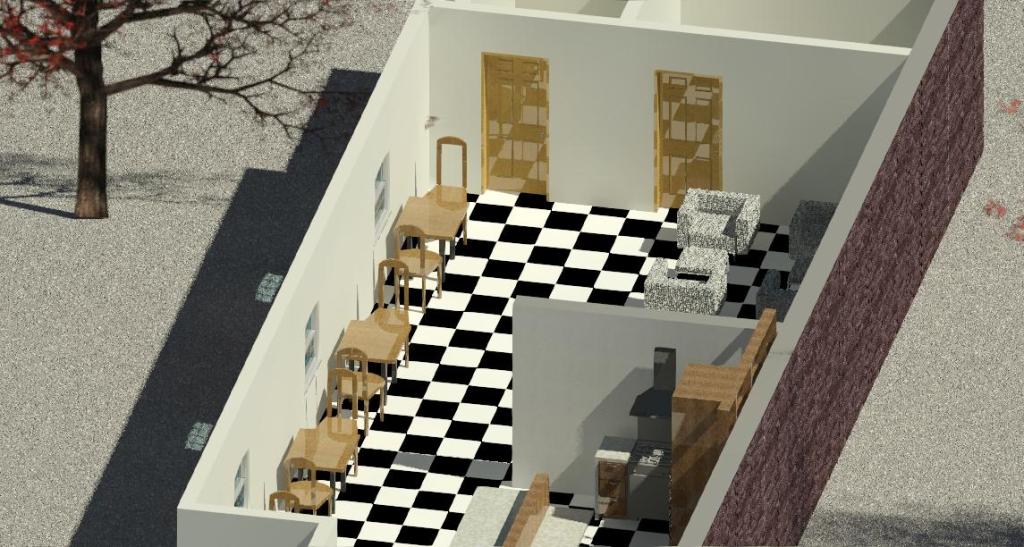
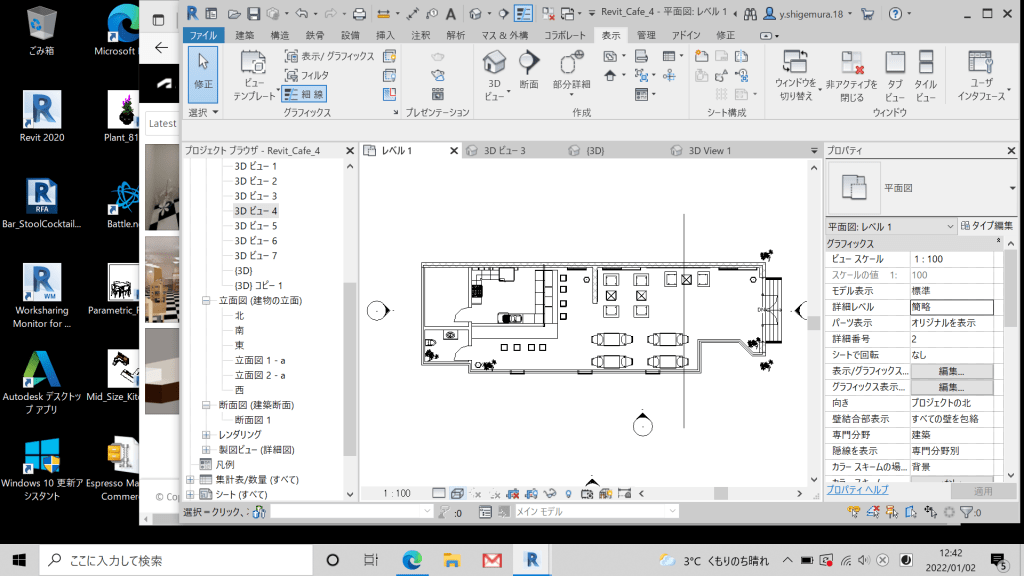
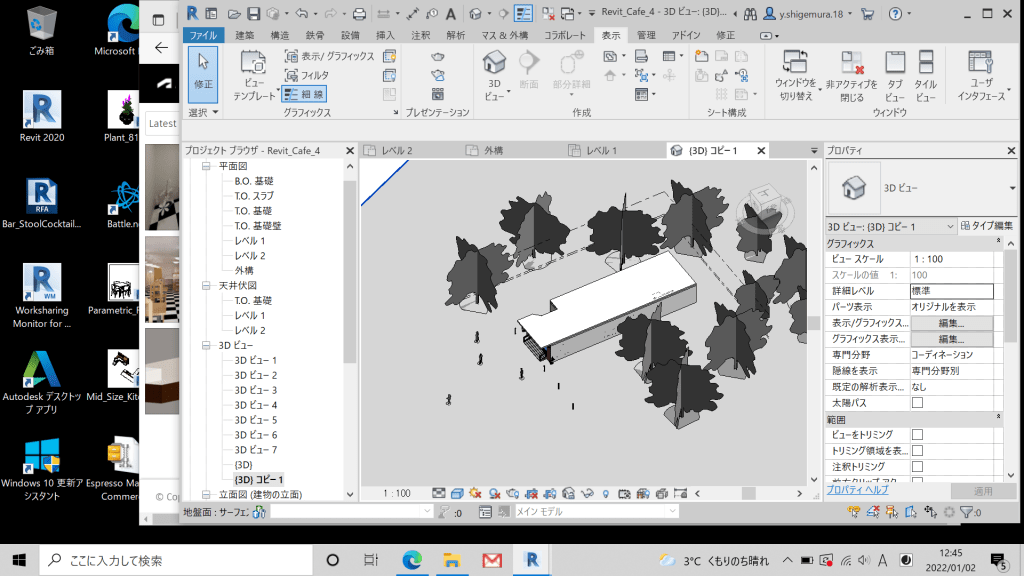
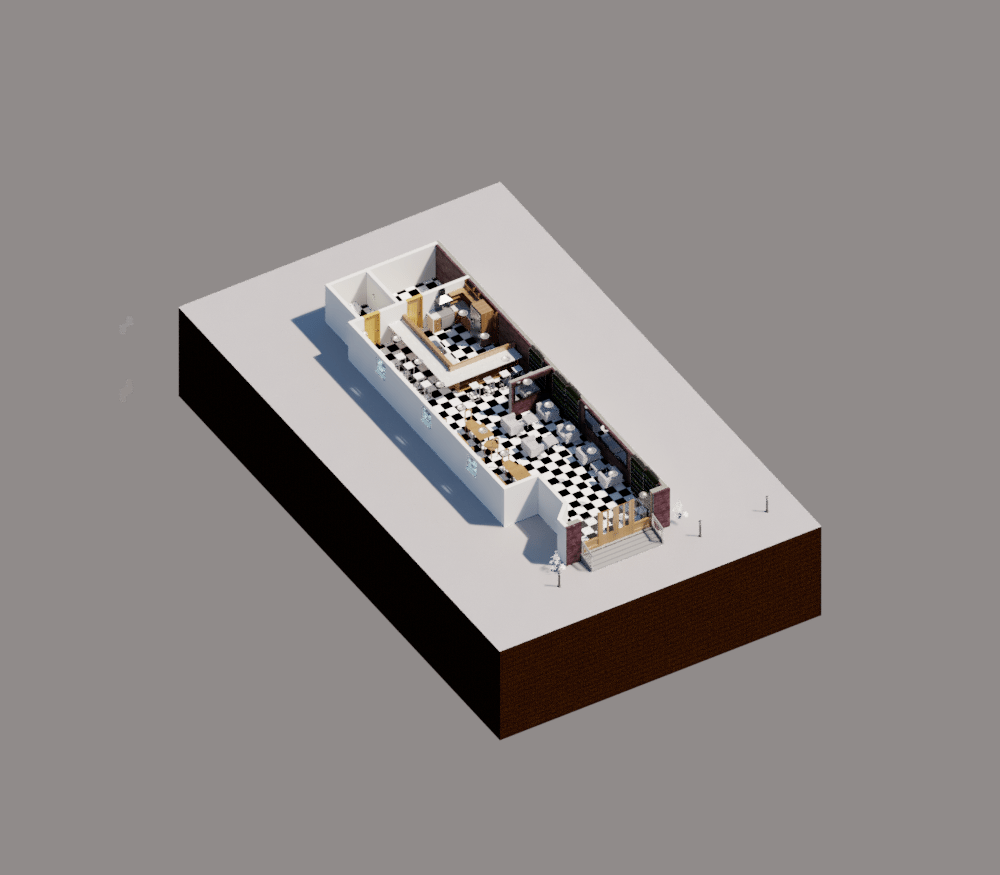
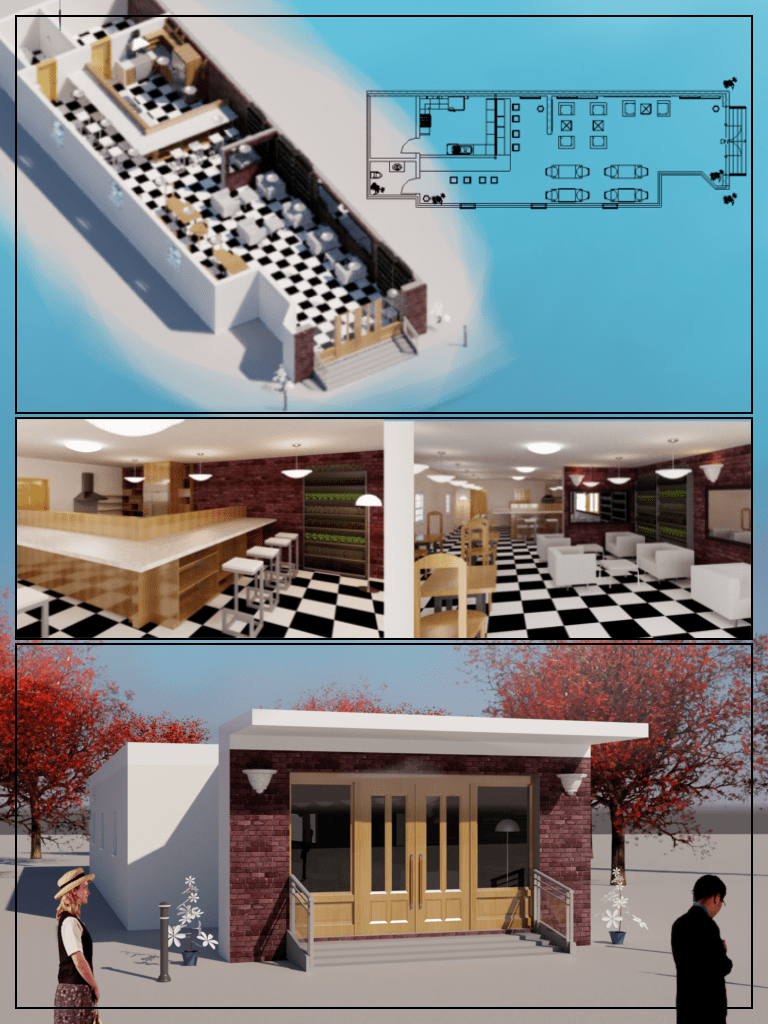
Finishing the cafe model, View setting
The below pictures are the overall of my modelling. I needed to prepare different types of rendered images for making the presentation board so this week I set some camera views for rendering. It was difficult to set the camera to be able to see from a good perspective.


Week 10
Rendering
This week, I began with rendering images in order to use these images for making a presentation board. I needed to render the image of high quality. However, It was not going well at first because the lights were not able to be correctly adjusted as shown below.


In general, there are many cases in which people complain that their renderings in Revit are too dark or completely black when completed. In case of that, we need to look at some key lighting settings to determine if they are the root cause. Verify the following 4 steps and you shall see the light:
STEP 1
“Verify that you have the appropriate Lighting Scheme selected for the view. Revit offers different lighting schemes to choose from. For example, if you select the scheme called ‘Interior: Sun only’, then you will not be able to render your view with any artificial light fixtures.”
STEP 2
“Once you have determined the appropriate Lighting Scheme, verify that your Light Groups are turned on with a checkmark and that dimming is set to 1. Keep in mind that you can only select Artificial Lights when a Lighting Scheme contains Artificial Lighting. For example, if you select the scheme called ‘Interior: Sun only’, then you will not be able to select any artificial lights fixtures.”
STEP 3
“Verify that you have selected the appropriate Daylight Portal options for sunlit interior renderings. In order to select the Daylight Portal options, first, click the Edit button under the Quality setting of the Rendering dialogue box. This will then open the Render Quality Settings dialogue box. Next, select which rendering quality you want (Draft, Low, Medium, High or Best) then click the Copy to Custom button. This option will then allow you to select which openings you would like to have daylight come through.”
STEP 4
“If your Artificial Lights are turned on, but little to no light is coming out of the fixture itself, then verify whether your lighting fixture family has geometry, such as a diffuser, that is blocking the light source definition. If you find that there is a diffuser, check to see if the diffuser material has a transparency. If the transparency is not selected, or the percentage is very low, you will see little to no light emission from your fixture.”
Week 11
Rendering
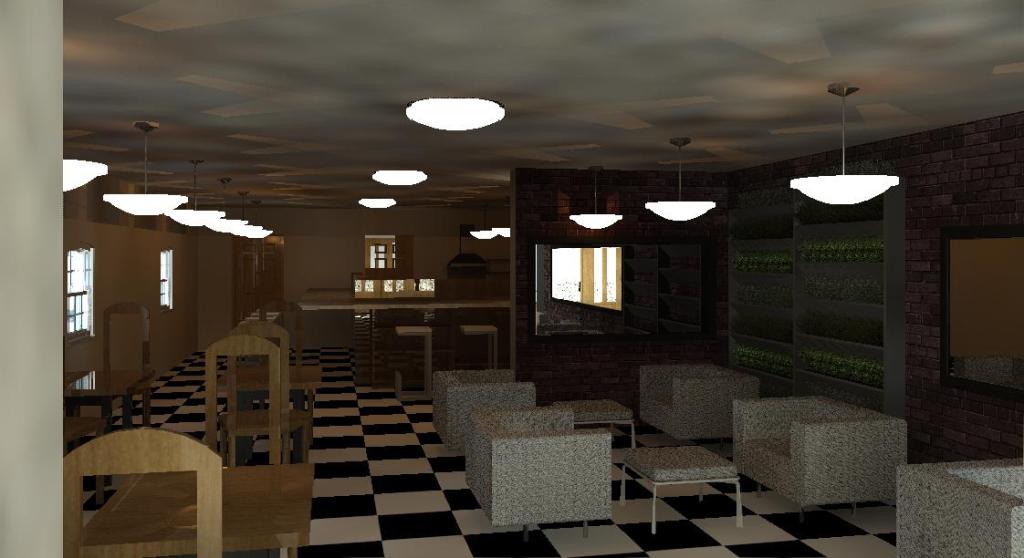
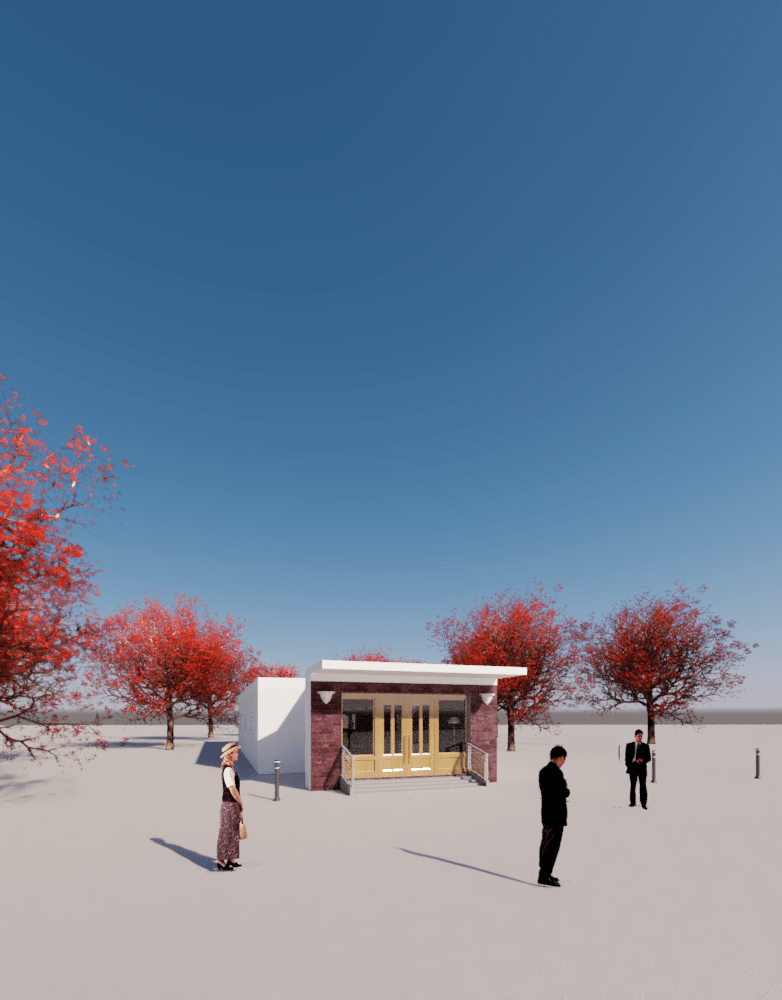
I was able to improve my rendering images compared to last week by following above steps. It became a more realistic than last week because I adjusted the exposure of rendered image.

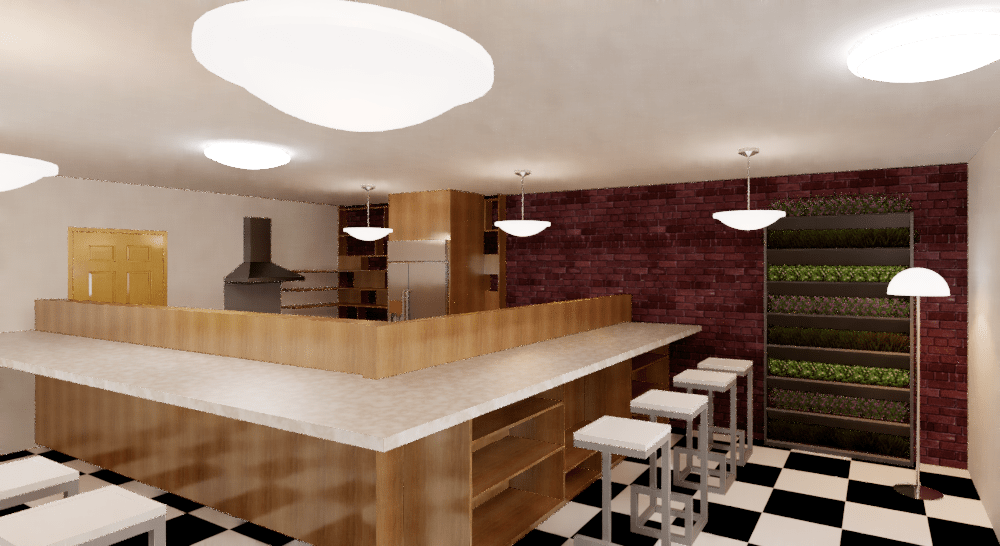

High-quality rendering
High quality rendered images were produced by cloud rendering. 3D models created in Revit can be displayed in photo-realistic views or rendered with built-in photorealistic renderers. It is reasonably fast and produces high-quality images. However, it does not support physically based rendering algorithms. Physically-based rendering provides images of much higher fidelity but requires significant computational resources. For this reason, it has been beyond the reach of the mainstream 3D mechanical CAD community and has been primarily used in the digital art and entertainment industries. However, the highly scalable computational resources available on cloud platforms open new opportunities for traditional CAD users.


Week 12
Presentation Board, Submit
These are final outcome for this project. I have created a presentation board with high-quality rendered images of last week. Although it was the first experience I felt that it would be a valuable experience for my future career.

Week 13
Feedback, NLT form, Handover Document
Feedback
I received feedback for my overall work from my client. The feedback is below:
“You have done excellent work. Your rendered images and presentation board are more attractive works than I expected. Your research and persona were also good. Well done. You said that you were not able to do everything you would like to do because of unexpected reasons. I would like to see your work more so work together next semester! It would be more nice project.”
NLT form
Update NLT1 form.
Handover Document

Summary
Overall, I think most of the tasks for this project was going well and have improved my skills on Revit. I also have a better understanding of architectural visualization through working with a real client. The client was pleased with my work as shown in the feedback. On the other hand, I was not able to do everything I wanted to do such as learning other software. It was due to the storage of my laptop and unexpected reason. However, my client said that he would like to work with me next semester. It will allow me to work with more high-quality work next project by preparing during the holiday. In conclusion, this experience was valuable and will lead to my future career.
